Blog written by Mill Creek Painters in Edmonton
When modernizing your home, painting trim and baseboards can make a world of difference. Not only in appearance, but also in home value! Allow our expert advice to guide you through the process!
Table of Contents
ToggleBest Paint for Baseboards
When selecting the perfect paint for your baseboards, it will be cheaper and more efficient to bite the bullet and choose a more high-end product. We recommend Cloverdale Renaissance, an enamel, water-based paint that comes in 3 different sheens to accommodate whatever look you’re going for. Melamine, Semi-Gloss, and Gloss. With high adhesion, coverage and great weather resistance, this product is a perfect replacement for the older oil-based alkyd enamels. This paint is excellent for protecting high-traffic areas that can quickly diminish in appearance. It is also far easier to keep clean.
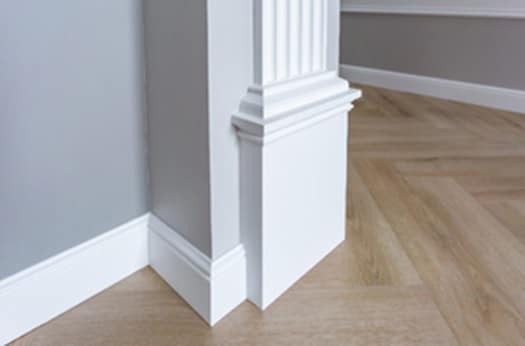
Note: Selecting a higher gloss sheen than what’s on the walls will help accentuate the molding!
When is it Time to Repaint my Trim?
The trim and baseboards actually make more of a difference to the refreshing of your home than you might think. For example, if you have oak trim, it’s probably starting to look a little too Full House, and not in a good way. If you’re wondering if white is an option, the answer is YES! It will require a light sanding of the current varnish and then a new layer of KILZ varnish. After that, we would suggest a minimum of 3 coats of Cloverdale Renaissance in your desired sheen.
Required Brushes and Materials
When using water-based paint, a nylon or poly-nylon combination brush is the easiest way to apply it. If you decide to go with oil-based paint, however, use a natural-bristle brush. A 2 to 2½-inch angled brush is a good option for painting trim.
For an interior painting project of this calibre, you should have on hand: a drop cloth or plastic sheeting, a vacuum, a damp cloth, painter’s tape, and a putty knife. Depending on the condition of your baseboards, you may also want to consider spackling materials and sandpaper.
Step-by-Step Guide: The Three Ps
Step One: The Prep
Lay down a drop cloth or tape down some plastic sheeting to protect the floor.
Check the baseboards to see if there are any noticeable nicks or large dings. Scrape away any loose/flaking paint and repair damaged areas with a spackling compound, and then sand the area smooth with a fine-grit sandpaper.
Vacuum the baseboards and adjacent flooring. Use a damp cloth to wipe down the baseboards in order to remove all the dust and dirt. Make sure the area is dry before proceeding.
Step Two: The Protection
Painter’s tape must be applied along both edges of the baseboard—where it meets the wall, and where it meets the floor. If you’re concerned about getting paint on the wall, simply select a wider tape. Get the tape as close to the trim as possible, without overlapping it.
Step Three: The Painting
The best place to start painting the baseboards is in a corner of the room. Work your way around the perimeter in sections measuring one-foot. Apply strokes in one direction, as opposed to going back and forth. Let the paint dry for a day minimum. It should feel dry to the touch by the next day. When the paint has dried, feel free to remove all painter’s tape.
In Conclusion
Repainting your trim and baseboards can prove to be quite tricky, but it is definitely worth considering. It makes more of a difference to a room’s appearance than one would think! Unsure of doing it on your own? Contact Mill Creek Painters help.

