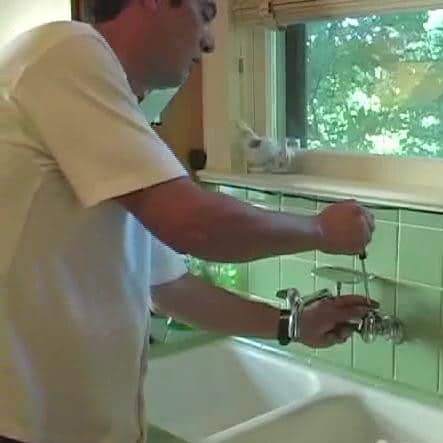
Drip. Drip. Drip. A leaky faucet is annoying and hard to ignore, but when we do ignore it it could lead to larger problems like water damage and a higher utility bill. Fixing a faucet is not a difficult job.

Why is my faucet dripping?
In most cases, either the inner seals of your shower head or tap are broken, or the other parts have corroded or clogged with hard water deposits. Sometimes, even the rubber O-rings and gaskets that seal the connections between moving metal parts wear down with time and use. When they do, water squirts or drips out. Dripping of water from faucets are the most common indicator that some internal part of the faucet is not working.
Why fix it?
It may seem like just a few drops of water, but a constantly leaking tap can waste a lot of water. Beyond the environmental impacts of wasting water, you’ll also be paying for it on your utility bill.
There is a tool called wasted water calculator that gives an accurate quantity of water wasted per day. If there is a drip every two seconds; it is calculated that there are 30 drips every minute and 43, 200 drips per day. As per the calculator, the amount of water wasted sums up to 2 gallons per day. Thus, fixing your faucets not only reduces your water bill, but can also save huge amounts of water.
How to fix a dripping faucet?
Find where the leak is and then remove the faucet handle. Every faucet is different, but the process is more or less the same.
- Many faucets will have a screw on the side or centre; loosen that. Some will have a cap over the screw. You’ll have to first remove the cover cap using a screwdriver and then remove the screws.
- After removing the cover cap, wiggle and pull on the handle to detach it temporarily from the faucet body. Initially, removing the handle manually may be a little difficult, if that’s the case buy a faucet puller or improvise with a screwdriver. Be careful not to damage your sink or the surrounding area.
- The next step is to remove the trim and the sleeve found over the faucet stem. To do this, you will need a deep socket that can extract the faucet stem from the valve body.
- Next, use the socket to unscrew the assembly by fitting it over the stem’s hex nut.
- After the faucet stem is pulled out of the valve body, replace all the seals, O-rings and the flat washer at the end of the stem. Sometimes, the washer has an additional screw attached to it and that will have to be removed as well.
- Next step is to lubricate the threads of the faucet stem with plumber’s grease and then replace it in the valve body.
- Once that is done, reverse the procedures to replace the faucet stem in the valve body. Temporarily put the handle back on, turn on the water supply, and test the valve. Then finish the reassembly.
YouTube has thousands of instructional videos and you could probably search one for your specific faucet or fixture if you require more help. If the problem persists, or you discover it’s something less simple, you should call in on of the best plumbers in Edmonton.
What to Read more? DIY OR HIRE A PLUMBER?


