Recessed lighting, most commonly known in Canada as pot lights, is a light fixture installed right into the ceiling. The light fixture is installed above the ceiling light, but thin trim might be on top of the ceiling material. No part of a pot light is hanging down or visible, when installed properly.
Most homes will have pot lights installed in some area. It might be for lighting the basement, or as task lighting in the kitchen or bathroom. You’ll also find pot lights in commercial and industrial settings, because they can brightly light large spaces and showrooms.
Warning: Installing pot lights requires special electrical permits and should be done by a professional and licensed electrician.

Why install pot lights?
Recessed lighting used to dominate commercial settings and basements, but they’re becoming more popular among homeowners for other home renovations. Kitchens, bathrooms and even walk-in closets are being lit with pot lights installed in the ceiling. These downward pointing lights are practical for providing ample task lighting on counter work spaces and in shower enclosures. Here are the most common places homeowners are installing pot lights:
Home theatre rooms. Recessed lighting can provide that authentic movie theatre style lighting.
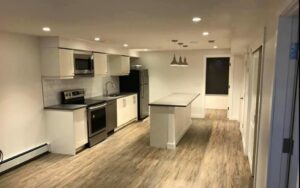
Task lighting in kitchens. Pot lights can provide directional light over countertops.
Basements. Since many finished basements might have a drop ceiling or a lower ceiling, they are commonly found in basements.
Shower enclosures. Recessed lighting is a great option for lighting an enclosed shower that doesn’t receive proper illumination from the main bathroom light fixture or a window.
While these are the most popular spaces for recessed lighting, you could install pot lights in any room of the house.
Pros of installing pot lights:
The fixture is not visible.
In some cases, you don’t want to see the light fixture. You just need the light. The ability to hide a pot light right in the ceiling is the main benefit of this lighting type. They remain hidden, while performing their main function: lighting the room.
Good solution for low ceilings.
This is why many homeowners choose to install pot lights in the basement. If the ceiling is lower than average, you don’t want a light fixture hanging down. It might stand out too much and make the space feel cramped. For some basements, you’d knock your head on a light fixture if it was too low. Recessed lights help those rooms with lower ceilings feel more open, without taking up valuable head space.
There are waterproof options.
Sealed recessed light fixtures are one of the only waterproof options on the market. This makes them the best and sometimes the only choice for your shower lighting.
You can light the entire room.
Generally, ambient lighting comes from a central mounted light fixture. This provides illumination from the middle of the room outward. With pot lights, you can have even ambient lighting throughout the entire space.
Pot lights are timeless.
Unlike some trendy light fixtures that can go out of style, pot lights can pass the test of time. They’ve been around forever and are still a popular choice in modern homes. Because their style is so subtle, it’s unlikely your pot lights will date your home.

Cons of installing pot lights.
Directional lighting can be challenging.
Pot lights provide directional lighting, which means they only light in one, very pointed area. The light shines directly below, or wherever they are pointing. That means you need lots of them to completely illuminate a room. For a large room, you might need up to 12 pot lights to cover the ceiling and provide proper lighting.
Because they are directional, they can be easily shadowed. For example, someone who walks in front of your recessed task lighting in the kitchen can cast a shadow over your work area.
They can diminish energy efficiency.
The lights are in the ceiling and will make holes that need to be sealed to maintain energy efficiency. There are ways to fill these gaps, but you cannot cover them with insulation. This is because the lights generate heat and if the fixture is touching insulation it could be a fire hazard. To work around this, you can get a sealed pot light or a light that is rated properly for nearby insulation. These pot lights will have housing that is “IC” rated. That stands for “insulation contact”. Read more about purchasing IC rated pot lights.
How to replace a pot light fixture:
If you’ve decided that you want to replace a recessed lighting fixture, read these step-by-step instructions on how to install recessed lighting. Note that these instructions are for installing pot lights where there were already pot light fixtures before.
Step 1 – Turn off electrical power.
You should turn the power off via the main circuit box and cover the switch with a piece of tape, so no one flicks it back on while you’re working. You can pick up a circuit tester at the hardware store to test that the power is off before you handle electrical wiring.
Step 2 – Choose your pot light housing.
There are typically two types of housing. Housing that can be used for new construction when you have complete access from above the ceiling and housing that can be used for renovations with limited access. Renovation housing is the easiest choice if you’re replacing old pot lights. If you’re going to insulate the area, always choose IC rated housing.
Step 3 – Choose the trim and baffles.
There is not much to a pot light, but you do have some options. The inner casing that covers the metal housing, to make it look more stylish, is called a baffle. Most baffles are simple, but you can choose a reflective baffle if you want to add dimension to your lighting or target a specific area with light. A reflective baffle can help expand the light circle’s diameter.
The trim is what covers the rim of the housing and what touches the ceiling the line. It helps hide any rough edges that might be cut into the ceiling for installation. Many pot light fixtures come with a combined trim and baffle.
Step 4 – Remove existing fixture and the junction box.
Ensuring the electricity is turned off, you can now remove the old light fixture and the junction box. You might have to use a power saw to cut the junction from the joist. Always watch for wires and don’t cut them with your saw.
Step 5 – Measure twice, cut once.
Now measure the hole you’ll need to cut to put in your new pot light fixture. Try tracing the new fixture on a piece of paper, then using that paper to trace your cut lines on the ceiling. In some cases, the old hole will fit your new fixture. Some fixtures will also come with a traceable template for your ceiling hole.
Step 6 – Cut the hole.
After carefully measuring, use a drywall hand saw or a hole cutter attachment on your power drill to cut the hole. Take your time to ensure a smooth cut. Older drywall might want to crumble so extra care must be taken.
Step 7 – Connect the wiring to the new pot light.
The light will have an attached junction box. Open it and clamp the wires – the shut it. Now strip the plastic off the end of the wires and use wire nuts to clamp them together. You’ll find there will be black, white and a bare ground wire. Connect them black to black, white to white and bare wire to bare wire. If doing this wiring makes you feel uncomfortable, contact an electrician to do the job for you.
Step 8 – Test it before mounting the fixture.
Turn the power back on at the circuit breaker and use a voltage tester to test the fixture. Electricity should be reaching the socket. If you’ve confirmed it works, turn the break back off and continue to the next steps.
Step 9 – Put in the pot light housing.
Now that you know everything works, slide in the housing into the hole. There will be clips along the sides of the housing that you can push inward with a screwdriver. When you hear a click, you’ll know it’s secure. Once all the clips are in place, give the housing a little pull to make sure it’s secure.
Step 10 – Install the trim and baffle.
Sometimes these parts are attached to the housing. If so, attach the housing to the holes in the pot light and slide the baffle and trim upward until the entire unit is flush with the ceiling line. Pot light fixtures typically come with coil springs or rod springs that help you install the baffle and trim in place. Please see manufacturers instructions.
Step 11 – Put in a bulb and turn the power on.
Check the manufacturers directions on the fixture you’ve chosen to see the approved wattage and size of bulb for that fixture. LED bulbs are a popular choice. Incandescent lights can produce too much heat. If your pot lights are attached to a dimmer switch, make sure the bulbs you select are compatible.

How to install pot lights where there were no lights before:
If you want to install pot lights where there were no fixtures before, it is a more complicated and complex project. It is recommended that you contact a licensed electrician for that job, as it will require installing new wiring. You might also need to upgrade the circuit breaker to accommodate the additional power on that room’s circuit.
If you still want to give this project a try, here are some step-by-step instructions. They are generally the same as above, but with a few added steps.

Step 1 – Turn off the power!
You should always turn the power off at the main circuit breaker before attempting any electrical project. You can pick up a circuit tester at the hardware store to test that the power is off before you handle electrical wiring.
Step 2 – Cut the hole.
Trace your fixture on a piece of paper to use as a cutting template. Some fixtures will come with a paper or cardboard cutting guide. Draw the outline of the hole on the ceiling first. Make sure you are not drawing over a joist. Then cut the hole carefully using a drywall saw or hole cutting attachment on your power drill.
Step 3 – Run the wiring.
Here is where it can get tricky. You’ll have to connect and run cable from the power source to a switch box and then to the first pot light hole you’ve cut going through the ceiling. Leave a foot and a half of extra wiring to make it easier to work with when installing the fixture.
Step 4 – Attach the wiring to the fixture.
Once the wiring is at the pot light opening, run it into the light’s junction box and clamp it. Then strip the plastic insulation off the wires and attached them. You’ll find there will be black, white and a bare ground wire. Connect them black to black, white to white and bare wire to bare wire.
Step 5 – Test it before mounting the fixture.
Turn the power back on at the circuit breaker and use a voltage tester to test the fixture. Electricity should be reaching the socket. If you’ve confirmed it works, turn the break back off and continue to the next steps.
Step 6 – Put in the pot light housing.
Most recessed lights have clips on the housing that clamp the housing to the ceiling. Pull out all the clips, ensuring they’re not sticking out of the housing. Then put it in the hole until it’s flush with the ceiling line. Then push the clips up and outward to secure the housing.
Step 7 – Secure the baffle and trim.
Sometimes these parts are attached to the housing. If so, attach the housing to the holes in the pot light and slide the baffle and trim upward until the entire unit is flush with the ceiling line. Pot light fixtures typically come with coil springs or rod springs that help you install the baffle and trim in place. Please see manufacturers instructions.
Step 8 – Put in the light bulb.
As mentioned above, you want to choose a light bulb type that has the appropriate wattage for the fixture. LED lights work best, are the most efficient and don’t give off heat like incandescent bulbs.
WARNING: As mentioned, you must ensure that the new pot lights will not exceed the electrical load that circuit can accommodate. If you are unsure if the total wattage of your new pot lights exceeds the amount of electrical load for the circuit, contact a licensed electrician. They can determine how much the circuit can accommodate and upgrade it if necessary.
If you are at all unsure about tackling either of these DIY electrical projects, contact a reputable and experienced electrician.

Find a RenovationFind Certified electrician in your city!

| Alberta | British Columbia | Saskatchewan |
| Edmonton Electricians | Kelowna Electricians | Regina Electricians |
| Calgary Electricians | Vancouver Electricians | Saskatoon Electricians |
| Victoria Electricians | ||
| Manitoba | Nova Scotia | Newfoundland |
| Winnipeg Electricians | Halifax Electricians | St. John’s Electricians |
| Ontario | Quebec | New Brunswick |
| Toronto Electricians | Montreal Electricians | Fredericton Electricians |
| Barrie Electricians | Quebec City Electricians | Moncton Electricians |
| Hamilton Electricians | Saint John Electricians | |
| Kitchener Electricians | ||
| London Electricians | ||