Here are some tips and resources that will help you prepare, construct and maintain your own fence.
Table of Contents
ToggleStep One: Local Regulations & Building Permits
Some municipalities require a building permit while others do not. Most of the time it depends on the height of your fence. Acquiring a building permit will also make sure you’re not building or digging near electrical, gas, water or sewer lines and ensure you’re within your jurisdiction’s building restrictions. Regardless of whether or not you need a permit you should schedule a site visit with a “Call Before You Dig” organization or make a call to the local utility office. This free service will mark out any lines you might have in your yard and let you know how far you need to be to dig your fence posts. Click Alberta One Call or BC One Call for more information.
All municipalities will have a zoning bylaw to ensure your fence is built within height, material, location and other restrictions. If you have a neighbourhood association you might have to check with them to make sure you’re within their own restrictions as well. Going through the hassle of double checking restrictions is better than having to tear down your new fence.
Step Two: Choose Materials and Style
If you are choosing wood make sure you choose a wood that will last a long time. Consult with your local lumber yard about wood options and learn how to best maintain your fence so it lasts a long time. A fence built of good wood that is well maintained can last up to 20 years. One of Edmonton’s fence material companies will be able to help you make a selection, offer pre-cut fencing packages, and can give you expert advice on construction and design.
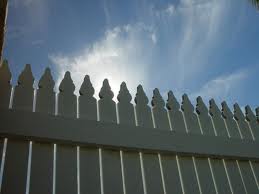
From split rail, to classic style, paneled and white picket fences there are many different styles of fences to choose from. Not sure what would look best with your home? Find inspiration with these wood fencing photos and design ideas by houzz.com/wood-fencing.
Step Three: Creating the Fence Layout
Find your property line. Usually when you apply for a permit or review restrictions they will give you information on your property line. You don’t want to build your fence in the neighbour’s yard!
Stake the corners roughly where you want your fence to go and tie a piece of string or twine between each stake to help you square your fence. Use a level on the twine to make sure all the stakes are perfectly squared. Use a level to ensure they meet at the stake at a 90 degree angle.
Stake the middle posts measuring lengths of 8 feet or less along the twine once the corners are squared. Take the total distance of your fence and divide it by 8. If it doesn’t divide equally then break it down into smaller sections to make sure they’re all even.
For a more detailed method for laying out the dimensions of your fence watch this YouTube video for detailed instructions.
Step Four – Digging Post Holes & Installing Posts
The height of your fence will help determine the depth of your post holes. They should be at least one-half the height of your post above ground or one-third the total post length. If you can’t dig this deep, try to go at least as low as the frost line, so 3 feet deep. If you were required to obtain a building permit, make sure your post hole depth is within restrictions. This is especially true for corner and gate posts.
Rent a power auger. A two-person power auger can make a long, labour intensive job into a much easier project. Visit one of Edmonton’s best landscape equipment rental companies for help selecting the appropriate bit size for your hole. The hole shouldn’t be too much wider than your post, even if you are planning on pouring concrete.
Put 3 to 4 inches of gravel at the bottom of the hole before inserting your pole to help prevent shifting. Get it in alignment, double check that they are still square at the corners, use a post leveler to make sure it’s straight and that it’s sitting at the right height. You can keep the posts in place by nailing boards near the bottom, supported by the ground.
Use a quick cure concrete mix and pour it in the hole until it’s two thirds full. Mixing instructions will be on the concrete packaging. Keep those support boards nailed into the post to keep it upright while the concrete is curing. Save some dirt and fill in the spaces around the concrete and the remainder of the post hole once the concrete is set.
Step Five – Start Building Your Fence!
Use a board or twine to make a mason’s line from one end post to the other and equal height above the ground and along the top of your post. This will help you make sure your fence is even along the top as you start to install the vertical boards. Add your 2×4 horizontal support boards and use a single rail for the entire length of each fence section. You can us 2 to 3 rails depending on the height of our fence. Ideally your fence should not be resting on the ground so install a kick board/rail a few inches above the ground.
Start attaching your vertical fence boards to the rails. Make sure each fence board is evenly spaced by using a spacer (usually 1/2” apart). You can buy pre-cut fence boards. Use galvanized screws or nails, although screws will be more secure as your fence ages.
Step 6 – Finishing
Increase the lifespan of your fence by treating it with stain or a weather-proofing finish. Regular maintenance will keep it looking great for years to come.
If you want to add to the design of your fence you could consider painting it to match the overall look of your home and yard. This will also help hide any blemishes or variances in the lumber. Follow the manufacturer’s directions for surface preparation, primer or pre-treatment, and number of coats. Remember that a painted fence requires more up-keep, regular maintenance and painting so be prepared to commit to the task.
Help from RenovationFind
RenovationFind.com has a directory of accredited home renovation companies you can trust, including a listing of the best companies for fence materials in Edmonton. If you would like to hire an Edmonton fencing contractor or landscaping company to build your fence, you will find them in our directory too.

